Are you curious to know how is cavity wall insulation tested? There are four main methods to test cavity wall insulation. These are Thermal Imaging, Blower Door Testing, Endoscopic Inspection, and Moisture Testing. I will share the details of these methods shortly.
To get to the basics, what is cavity wall insulation? It refers to filling the gap, or “cavity,” between two layers of a building’s exterior walls made of brick with insulating material.
This cavity is typically found in walls constructed after the 19th century and is a barrier to improving thermal efficiency. According to the Energy Saving Trust, a reputable organization in the UK, cavity wall insulation reduces energy use by maintaining a constant temperature in your home.
So, we can say that cavity wall insulation’s primary purpose is to reduce heat loss and improve energy efficiency. Reducing heat transfer through walls helps keep indoor temperatures steady. This is why you don’t need to use too much heating or cooling. That way you can save money on energy bills and reduce carbon emissions.
Importance of Insulation Testing
Knowing how cavity wall insulation is tested is important to understanding its effectiveness in improving energy efficiency. This way we can learn how it maintains the safety of a building.
1. Energy Efficiency
Through proper testing, you can verify that the insulation is installed correctly and evenly. It needs to prevent gaps or cold spots that can lead to heat loss. This will ensure that the building meets energy efficiency standards, reducing heating and cooling costs while lowering carbon emissions.
2. Moisture Prevention
Insulation cavity testing helps find problems like water leaks or dampness that can affect how well the insulation works. Moisture inside the walls and in between the brickwork can cause damage to the building, mold to grow, and unhealthy air, which can harm the people living there. It might require patchwork to be fixed.
3. Longevity and Performance
Regular testing makes sure the insulation stays in good condition over time, stopping it from shifting or breaking down. It also helps find any problems with the material or how it was installed.
Ultimately, thorough testing is a good way to check energy performance, structural safety, and long-term cost savings.
Common Insulation Testing Methods
1. Thermal Imaging
Thermal imaging involves using infrared cameras to identify heat loss and cold spots in the walls. This non-invasive method helps detect areas where insulation might be missing or insufficient.
2. Blower Door Testing (Pressure Testing)
This test measures air tightness by creating pressure differences inside the building. It identifies insulation leaks and ensures the building envelope is properly sealed.
3. Endoscopic Inspection
An endoscope is inserted through a small drilled hole. It allows for a visual inspection of the cavity. This method checks for obstructions, debris, and proper distribution of the insulation material.
4. Moisture Testing
Moisture meters assess dampness within the walls. It ensures the insulation hasn’t absorbed water, which can affect its performance and cause structural damage.
Step-by-Step Testing Process
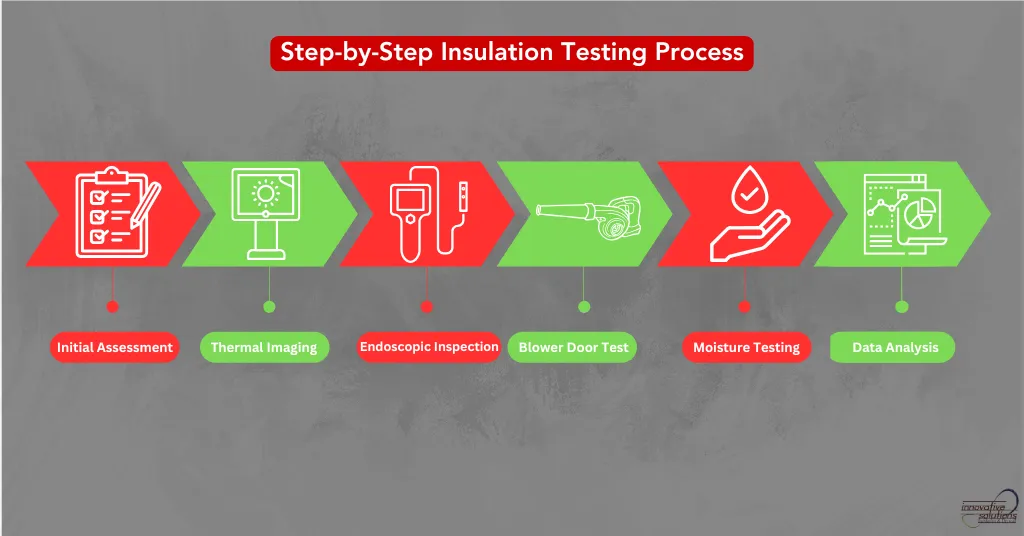
Initial Assessment
We walk around the outside of the building and look closely for any issues. We check for cracks in the walls, moisture stains, or signs of water damage. These could be areas where water is getting in or where the building might need repairs.
Thermal Imaging
For this, we use an infrared camera to scan the walls. The camera shows us the temperature differences on the surface of the walls. If we detect cold or hot spots, it could mean there are gaps or places where the insulation is uneven or missing.
Endoscopic Inspection
To check inside the wall, we drill a small hole in a hidden spot. Then, put a small camera (called an endoscope) into the hole. This lets us see the inside of the wall to look for things like dirt, blocked areas, or wet insulation.
Blower Door Test
To set up a blower door system, we install the fan into a door frame and seal the edges. Turn the fan on to either pressurize or depressurize the building. This helps us find air leaks, like cracks or gaps in walls and windows.
Moisture Testing
To check if the walls are damp, we use a moisture meter. This tool helps us detect how much moisture is inside the walls.
Data Analysis and Reporting
After all the tests, our expert ISID team goes through the results carefully. We look for any problems like damp spots, air leaks, or insulation issues. Then, make a report that explains what’s wrong and suggests the best fixes or improvements to solve the problems.
Equipment Used in Testing
- Infrared Cameras: Used for thermal imaging to detect heat loss and cold spots.
- Blower Doors: Creates controlled pressure to check for air leaks and ensure the insulation is working properly.
- Endoscopes: Allows for internal visual inspections of the cavity wall.
- Moisture Meters: Check how much water is in the walls to avoid problems caused by dampness.
- Heat Flow Meters: Checks how well the insulation keeps heat in to make sure it works effectively.
These tools ensure accurate and comprehensive testing to maintain energy efficiency and building safety.
Standards and Regulations for Insulation Testing
While performing cavity wall insulation tests, it’s important to follow industry standards and regulations to ensure safety and effectiveness. These guidelines help make sure the work is done right and meets building codes.
These standards dictate the use of proper equipment, qualified professionals, and accurate reporting for reliable results.
Our team at ISID strictly adheres to the standards and regulations of Denver, Colorado.
If you are looking for the best cavity wall insulation services, Innovative Solutions is the perfect choice. Contact us for our services because we are the best in 2025 to fulfill your insulation needs.
Interpreting Test Results After Cavity Testing
Test results are checked to see how well the cavity wall insulation works in keeping heat in, blocking moisture, and sealing air leaks. Key things to look for include:
- Even color patterns show the insulation is good, while cold spots or uneven areas mean there are gaps.
- High air leaks show poor sealing or missing insulation, while low leaks mean the insulation is working well.
- Drywalls mean the insulation resists moisture well. Wet walls show water is getting in, which can cause problems.
- Insulation that is even and free of debris means it was installed correctly. Blockages or uneven parts show there are issues.
Looking for Drywall or Insulation Services in the Denver Area and Beyond?

Common Problems Identified
Testing cavity wall insulation often reveals issues that can affect its performance. Some of the most common problems include:
- Air Leaks: Gaps in insulation or poor sealing allow drafts and heat loss.
- Moisture Problems: Damp insulation caused by water ingress can lead to structural damage and mold growth.
- Insufficient Coverage: Incomplete or uneven insulation reduces thermal efficiency.
- Settling or Degradation: Older insulation may settle or degrade over time, leaving gaps.
Recommendations for Homeowners
Based on my 20+ years of experience, below are a few tips for homeowners in Denver and the neighborhood after they get their cavity wall insulation tested.
- Close gaps using caulk, weather stripping, or more insulation.
- Fix water leaks by repairing cracks, adding waterproof layers, or replacing wet insulation.
- Add more insulation or spread it evenly to cover all areas.
- Replace old insulation with new, better-quality materials for improved results.
People Also Ask
How Do You Test for Cavity Wall Insulation?
Cavity wall insulation is tested using four main methods: thermal imaging, blower door testing, endoscopic inspection, and moisture testing. These tests help identify heat loss, air leaks, insulation gaps, and moisture problems.
How Do You Check for Insulation?
Insulation is checked using thermal imaging for heat loss, blower door tests for air leaks, endoscopic inspection for cavity examination, and moisture meters for dampness detection. These methods ensure insulation efficiency and structural safety.
What Is Cavity Inspection?
Cavity inspection is a process where an endoscope (small camera) is inserted through a drilled hole to visually assess insulation quality, detect blockages, and check for moisture damage within the wall cavity.
What Are the 3 Methods of Providing Cavity Insulation?
The three common methods of providing cavity insulation are blown-in insulation, foam injection, and insulation boards. Each method enhances thermal efficiency by filling gaps in the wall cavity to reduce heat loss.
How Often Should Cavity Wall Insulation Be Tested?
Cavity wall insulation should be tested every 20-25 years to ensure it remains effective, prevents moisture damage, and maintains energy efficiency. Regular testing helps homeowners save on energy bills and avoid structural issues.
By now, we know that knowing how cavity wall insulation is tested is important to maintain a comfortable home. By testing, you make sure that your insulation is installed correctly and lasts over time.
Moreover, regular testing (once every 20-25 years) helps save energy, lower bills, and create a healthier living environment.